

Hi, it’s Ninzaburo.
Do you do in-camera RAW development?
Although it has been installed since the second previous GR, I have hardly used it before.
As you know I talked about the newly installed metering “Highlight-weighted” in my last post. When taking a picture with it, sometimes the image gets darker than expected. There may be times when you are disappointed to see dark images you have taken in situations where you can’t redo. Another writer said to me "Set it to RAW+ so that even when JPEG images are very dark or you don’t like them, you can rescue them with RAW development" and I thought it was worth trying. Many of you may be already familiar with how to use it well, but bear with me.
First, about how to begin in-camera RAW development.
Because you need to save the captured image in a RAW format, set the File Format to RAW or RAW+.
Next, in the playback mode, display the image you want to develop, select MENU → Playback Settings → RAW Development to display the parameters.
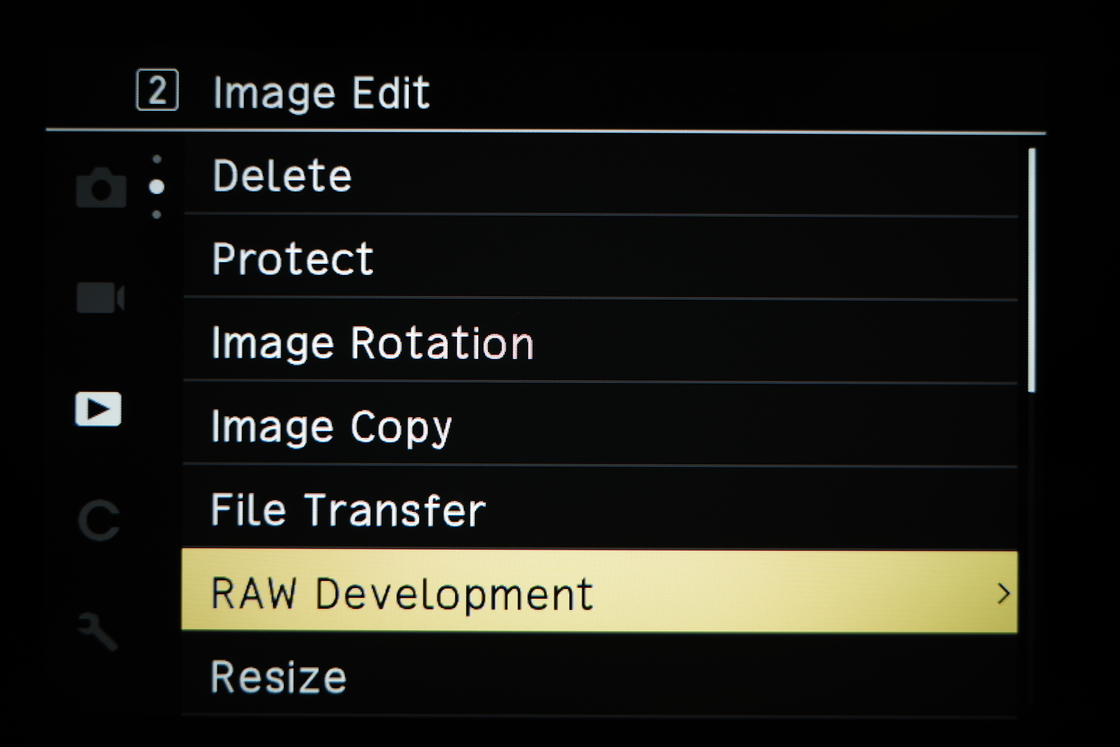
Or, while playing back the image, press the video/wireless button (button on the side of the camera) to have the playback menu displayed on the screen.
It's useful because you can immediately go to RAW development and image editing mode in the middle of the playback.
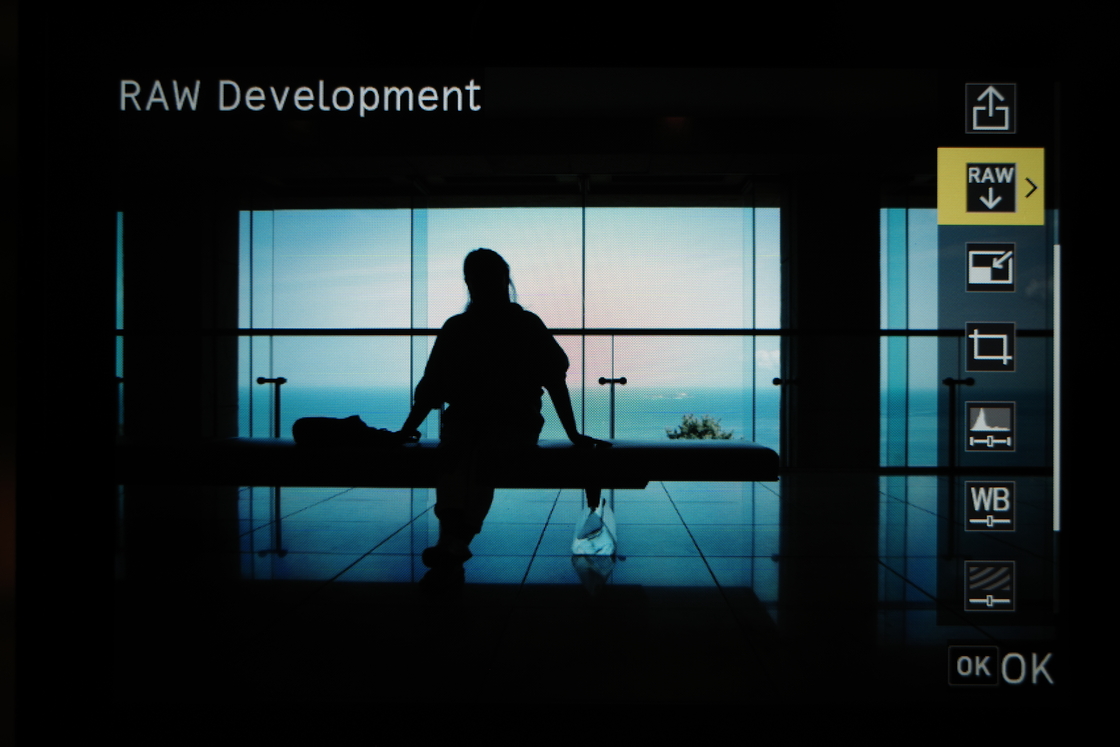
Let's begin RAW development- the main topic.
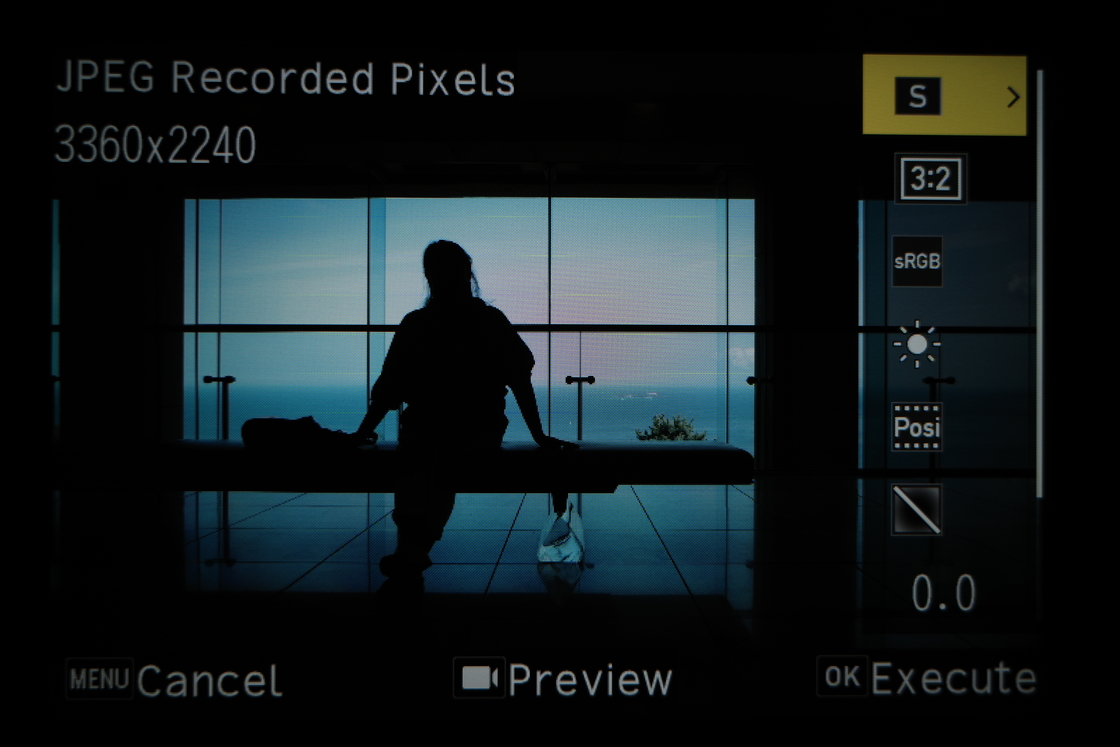
In the in-camera RAW development, you can adjust the following nine parameters.
· JPEG Size
· Aspect Ratio
· Color Space
· White Balance
· Image Control
· Peripheral Illumination Correction (Vignetting)
· Sensitivity (Exposure)
· High-ISO Noise Reduction
· Shadow Correction
In order to turn the dark image brighter, adjust the following three parameters.
· [Sensitivity] set to positive
· [Shadow Correction] to "Strong"
· Press Fn button and set [Key] of the advanced setting of [Image control] to positive
In addition, depending on the condition of the photo, you can give it more brighter impression by adjusting the White Balance and Image Control.
Let's see how it works with an example.

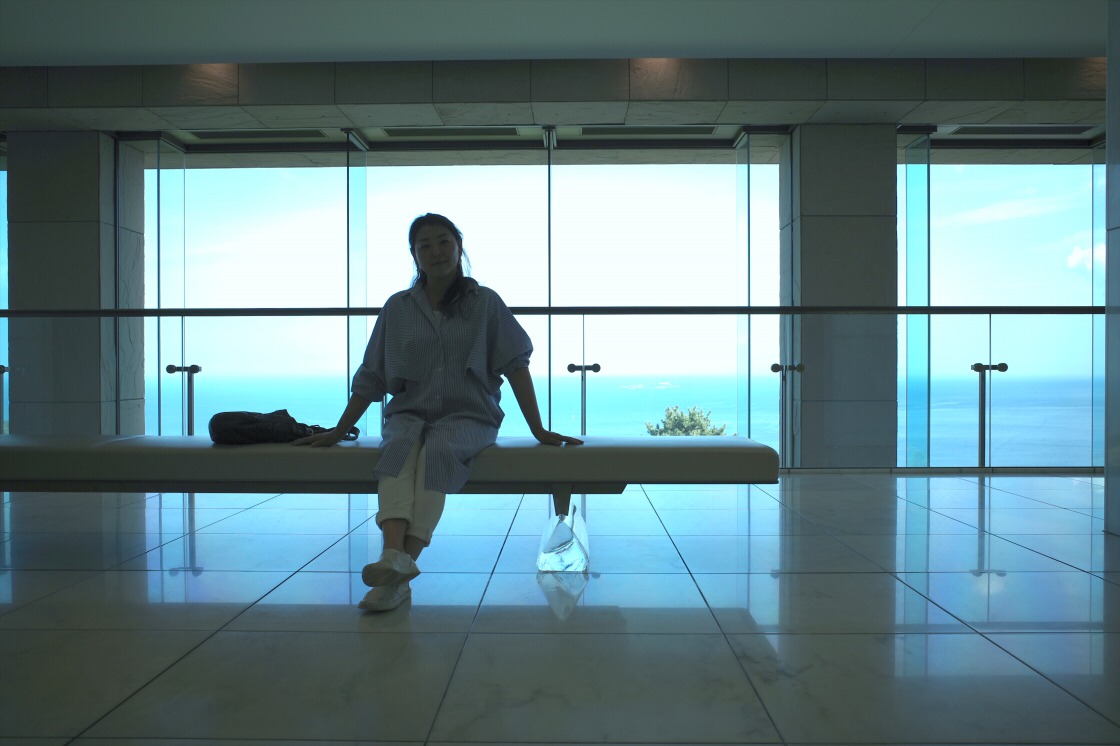
It’s a picture of a model with the sea and island behind the window.
The sea and island look beautiful in the background, but the model's face has fallen black. . .
It’s disappointing for both the model and me.
F4.0, 1/250, ISO100, EV0.0
White Balance Daylight
Positive Film (Saturation 0, Hue 0, High/Low Key Adjustment -1, Contrast +2, Contrast (Highlight) -1, Contrast (Shadow) -2, Sharpness 0, Shading 0, Clarity 0)
Time to develop the RAW file!
While keeping the sea and island dark enough, you can correct it as far as the model's facial expression can be seen.
Both the model and I are happy now.
It has been literally rescued by the RAW development.
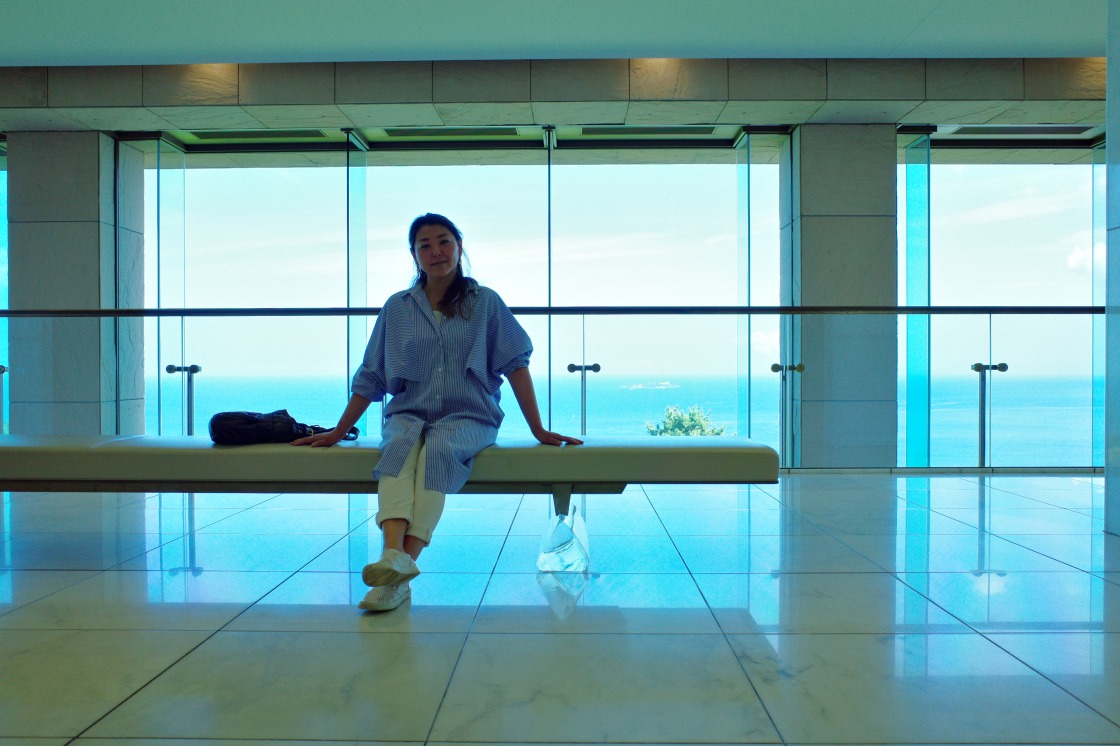
White Balance K (4000),
Vivid (Saturation +2, Hue 0, High/Low Key Adjustment +4, Contrast +1, Contrast (Highlight) 0, Contrast (Shadow) -4, Sharpness -2, Shading 0, Clarity +2)
Peripheral Illumination Correction ON, Sensitivity +1.0, Shadow Correction Strong
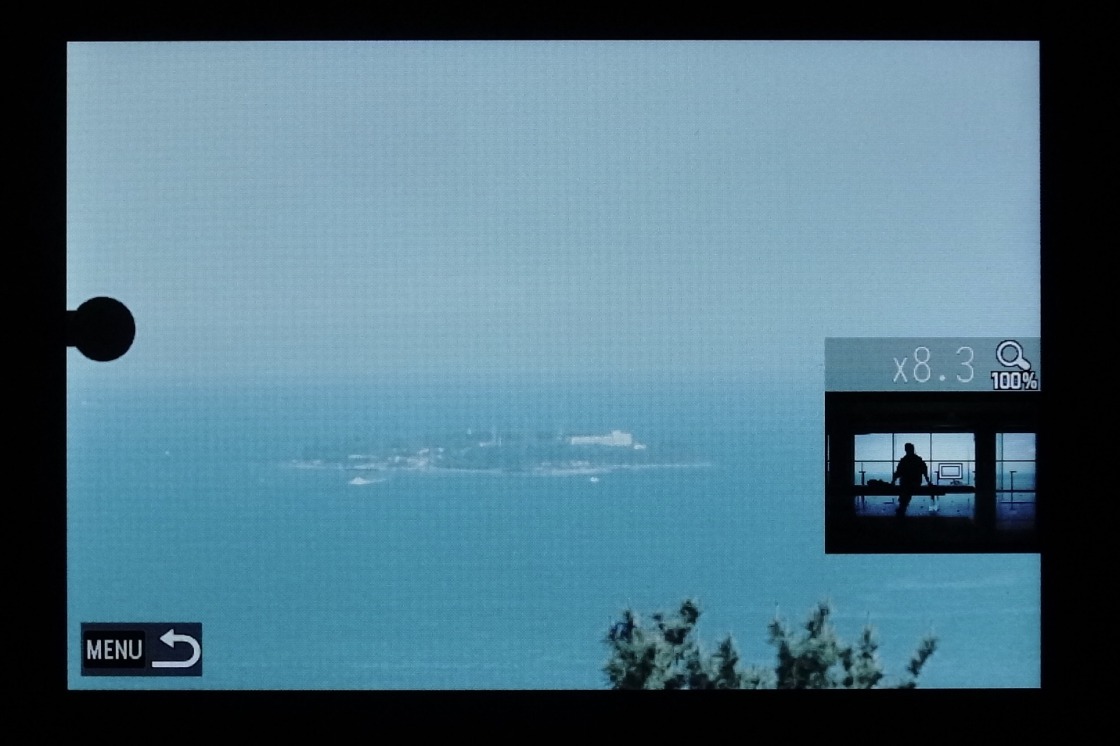
In the process of fine-tuning each parameter, "Preview" can be very useful to sneak-peak the final image.
Once you press the "Video/Wireless” button once, you can preview the center of the image you are developing at 100% magnification rate.
The magnified area is displayed with a white frame in small window on the right, and you can use the four-way controller to move the magnified part. You can also change the magnification rate with the e-dial in the front.
The magnified part and its rate are memorized to make it easy to check the same part repeatedly.
In this particular development process, this function helped me make the island less visible in the background.
With the GR series, you can also edit JPEG data in camera.
Let’s compare RAW developed data and JPEG edited data.
The goal is the same as the RAW development- to make the model's face bright while keeping the shadow of the island in the background dark.
Here is the result achieved by adjusting the brightness with the JPEG level correction and the color tone with white balance correction.

1st image: JPEG correction 2nd image: RAW development
Closer, but the color is still dull.
Having examined the reasons why this happens, I have found that when compressing the data to JPEG format, the color information of the the overexposure and overexposure areas are vastly lost.
In that sense, as for RAW data, seemingly over-white or black-out areas may contain some color information at the time of shooting and you can reproduce the tone by developing it.
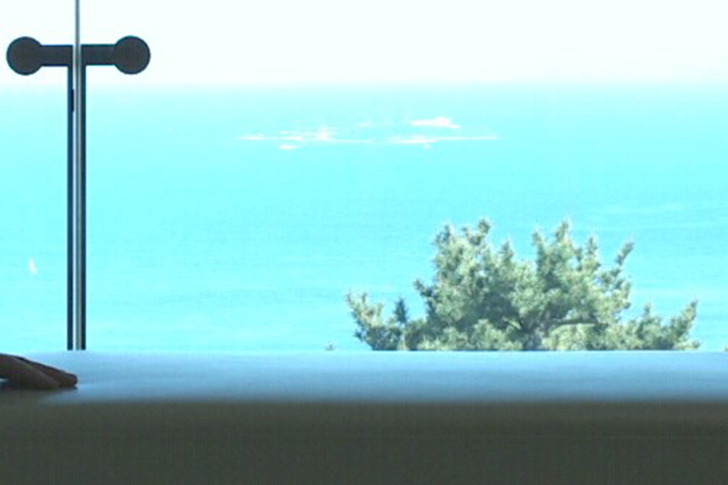
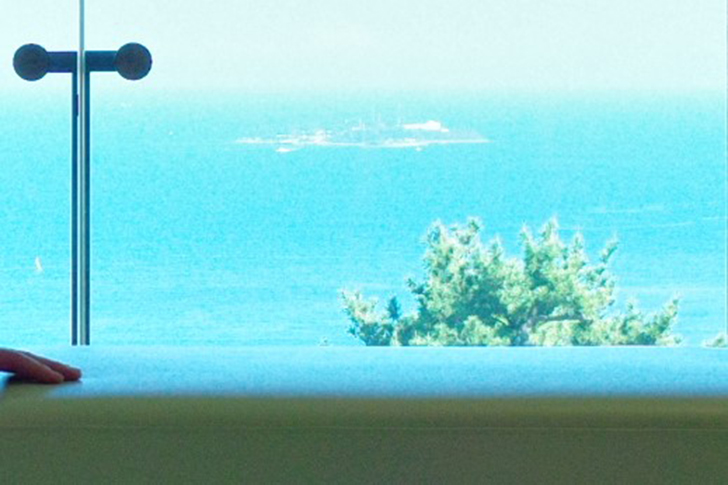
1st image: JPEG correction 2nd image: RAW development
Resolutions in both pictures are different.
Comparing the shadow of the island that I wanted to clarify, the JPEG picture looks flat and unclear. Some vertical stripes, which did not exit in the original image, are visible on the surface of sofa too.
JPEG data is compressed each time it’s corrected and it is degradad after a series of corrections.
In RAW development, such deterioration does not occur because the final image is saved once after making all the adjustments.
I have explained in detail so far. Hope you understand the advantage of RAW development. Note that RAW format data is much larger than JPEG, so the number of images you can store will change significantly (for example, you can save up to 140 images for JPEG (Size L) in the GRIII internal memory, but 31 for RAW+ (Size L)).
Having used the in-camera RAW development for the first time, it was easy for me to understand each parameter (maybe because I am used to operating the GR though). Even for the first time it was easy and I enjoyed it. It’s easy but you can fine-tune each parameter.
There are nine major categories, and the Image Control is subdivided into many categories. It’s not too much to say that the variations are infinite.
Try RAW development to freely finish the photo after shooting as well as find your favorite setting!
That’s all.
(Ninzaburo)


