

Hello, it’s KA-TSU.
Many people stopped by at our booth in CP+ 2019. Thank you. We were asked various questions from people who tried the GR III there. We will share with you articles regarding the new product on GR Official.
This time, let me talk about something rare for GR the snap shooter- "High sensitivity noise" and "Long exposure (Bulb).”- how much they have been improved compared to the previous models.
What a topic for the second review by the writer, right? But that’s what makes the GR unique, isn’t it?
I participated in “Starry Sky Photography Tour in Kozushima Island" from February 8 (Fri) to February 10 (Sun) as the lecturer.
It was the tour announced at the end of my previous article.
Here’s how it went (sorry, I have combined the tour report and the review together).
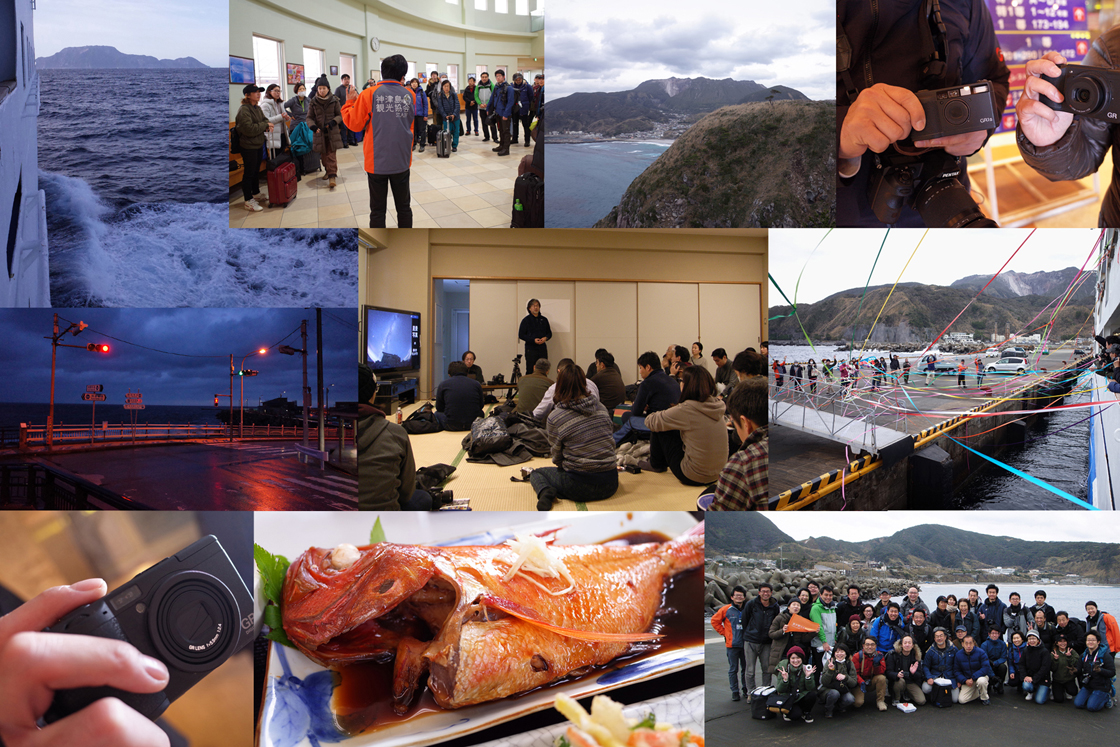
Any camera was welcome, but there were quite a few GRs. It might as well have been a GR trip!
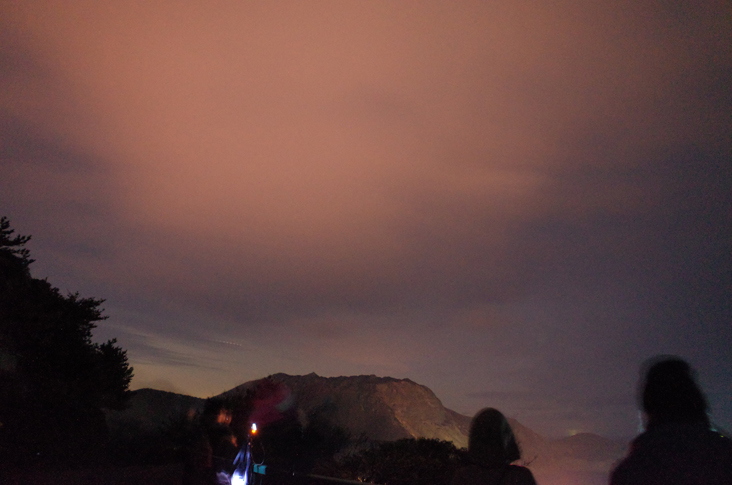
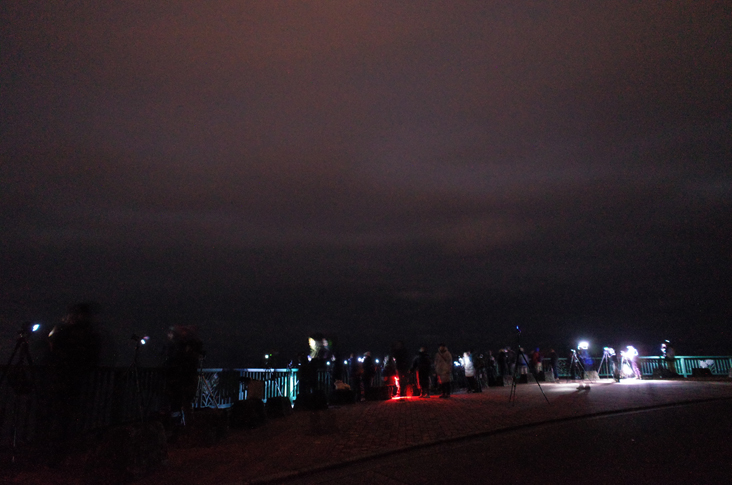
It was a little snowy in Tokyo on the day and we anticipated it would not be clear at night but we were lucky enough to observe the bright winter constellations through the clouds.
Both GRII + Wide Conversion Lens (21mm equivalent) F2.8 ISO3200 20sec WB 4200K
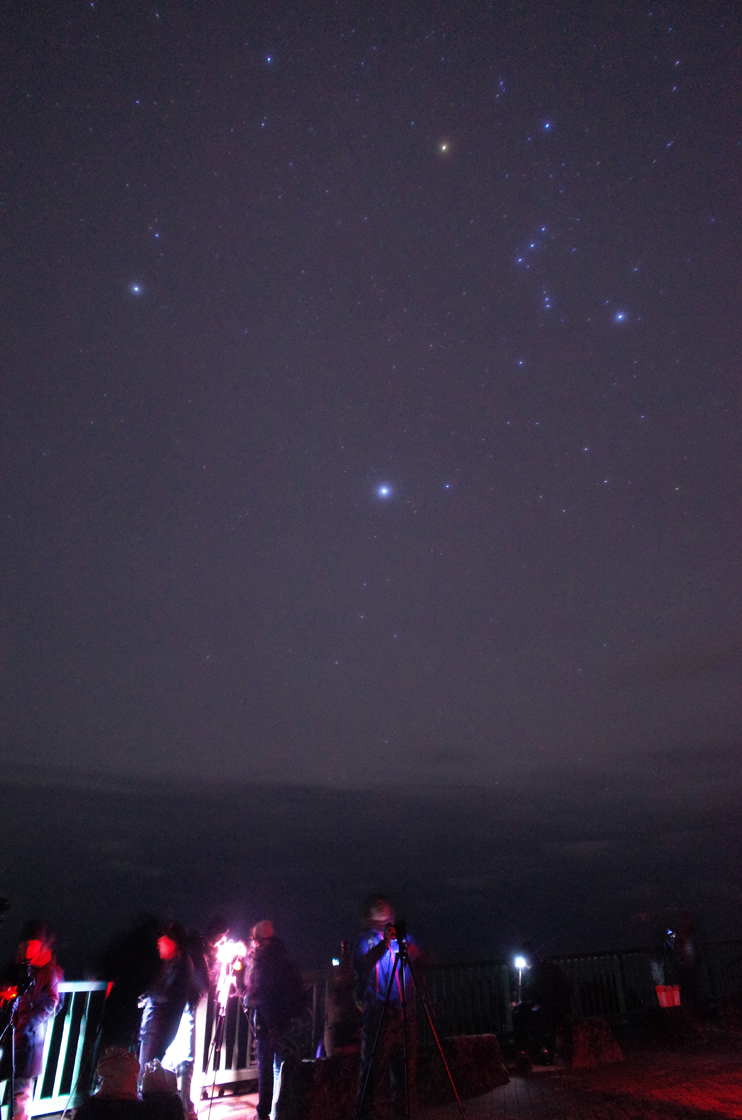
The winter triangle through the clouds GRII + Wide Conversion Lens (21mm equivalent) F2.8 ISO3200 30sec WB4200K
The photos above were shot with the GRII.
I know you are interested in the GR III.
I was there one night earlier than the tour participants and was able to shoot with the GR III the starry sky with less clouds.
Kozushima Island was magnificent. First of all, let me show you its amazing environment.
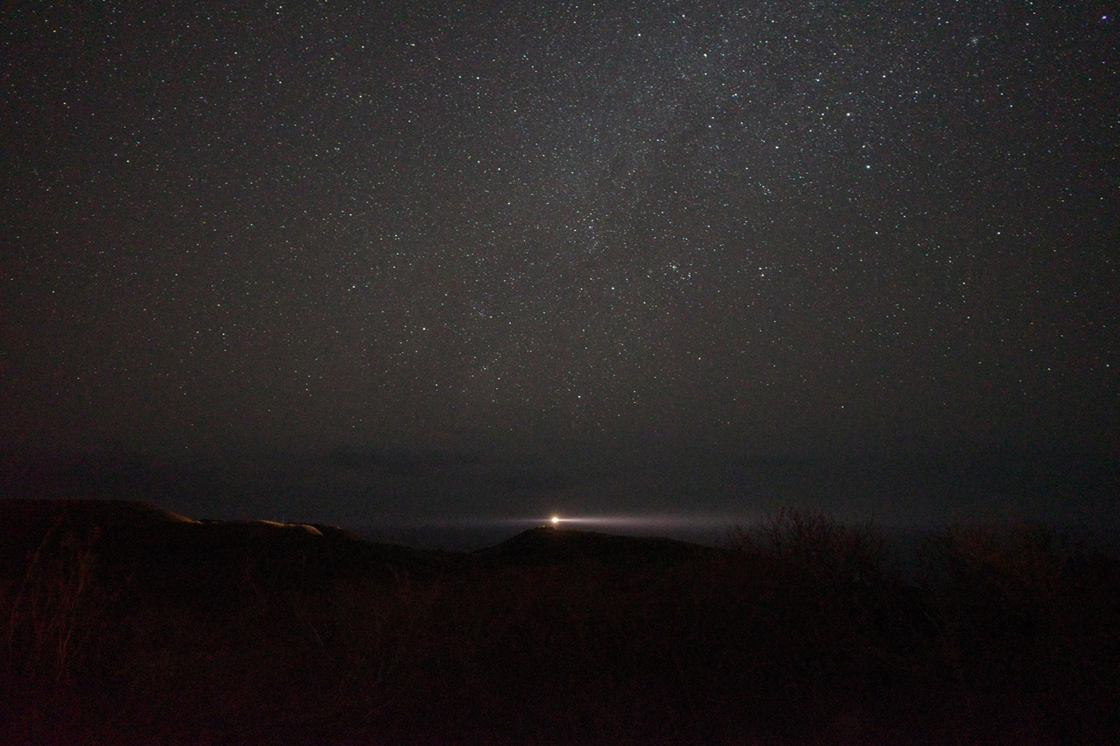
GRIII F2.8 ISO6400 20sec WB4200K M3B3 Key +2 Contrast (Shadow)+2,
With the in-camera RAW development, I increased High/Low Key Adjustment by +2 and the image was brightened and increased Contrast (Shadow) by also +2 in order to brighten the objects on ground.
The WB was at 4200K M3B3 (but there was not much difference because it was too dark to have a distinct color).
It was completely dark!
You can see the pale winter Milky Way (opposite the center of Milky Way Gallaxy) flowing from a little lower than the center- above the lighthouse- to the upper right of the image.
In the picture below, the camera was redirected a little bit towards upper right along the pale Milky Way.
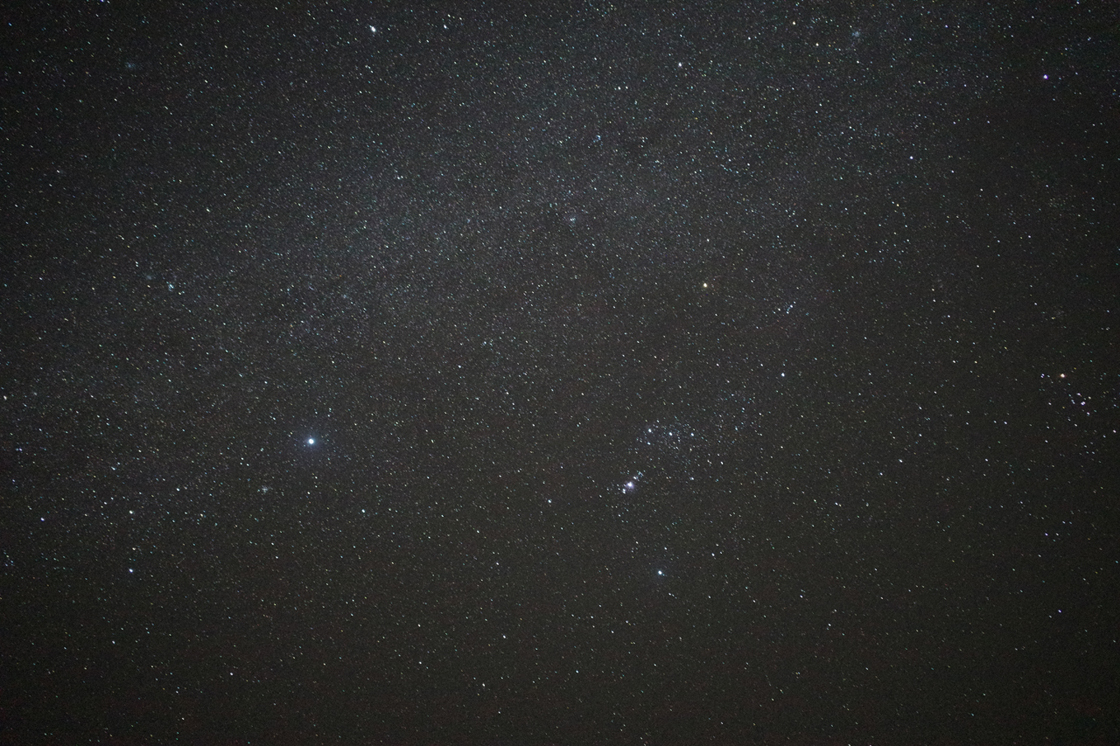
GRIII F2.8 ISO12800 20sec WB4200K
Since it was over-exposed, I decreased High/Low Key Adjustment by -2 in the in-camera RAW development.
You can see the winter triangle and Orion in the extension of the above-mentioned winter Milky Way.
The GRIII is equipped with the shake reduction and the low-pass selector.
When the low-pass selector is set strong, false colors you see without a low-pass filter are suppressed and the colors of the stars such as white blue Sirius or orange Betelgeus look clearer.
All the photos below were taken with the low pass selector set to strong.
Even with a full frame camera, which performs better in low light, I rarely set the ISO sensitivity at 12800. I didn’t want to continue it and set it at the ISO 6400, which I don’t dear to do with an APS-C machine often.
By setting the shutter speed at 30 seconds, despite the movement of the stars, there was more brightness in the picture.
Below is the result of pointing the camera to the direction where the ground was receiving orange city light.
GRIII F2.8 ISO6400 30sec WB3700K M2B4
Even at such a high sensitivity rate, it makes a good picture. The high sensitivity noise was more or less equivalent to that of the GR II at the ISO 3200. Good picture quality.
Honestly, it was so dark that I could tell the GR III would perform much better than the GR II without even trying it.
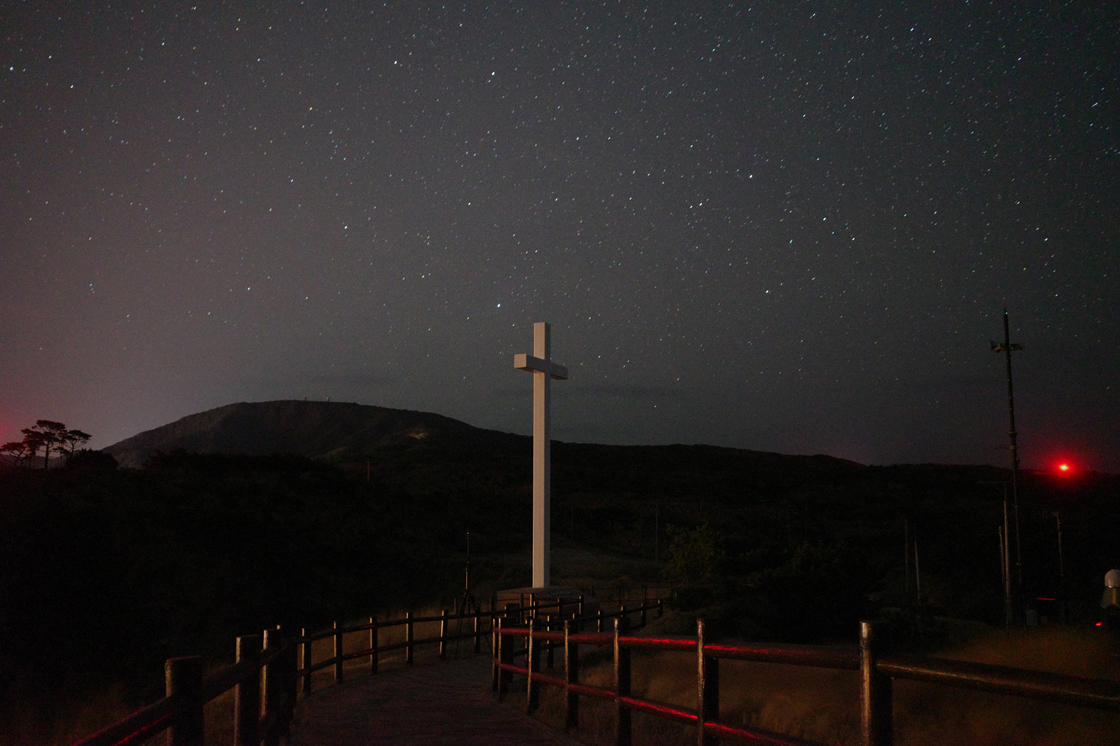
The cross in the center of the image was as big as about 10 meters high.
In this place, not only the orange city light was strong but also the two lights that each building had to inform the aircraft of their height were bright. It not only was very dark but also had different light sources with an extreme color- a very tough environment to photograph.
From the side where the red light shed the cross, I tried to take some images that included the Polaris and the Big Dipper.
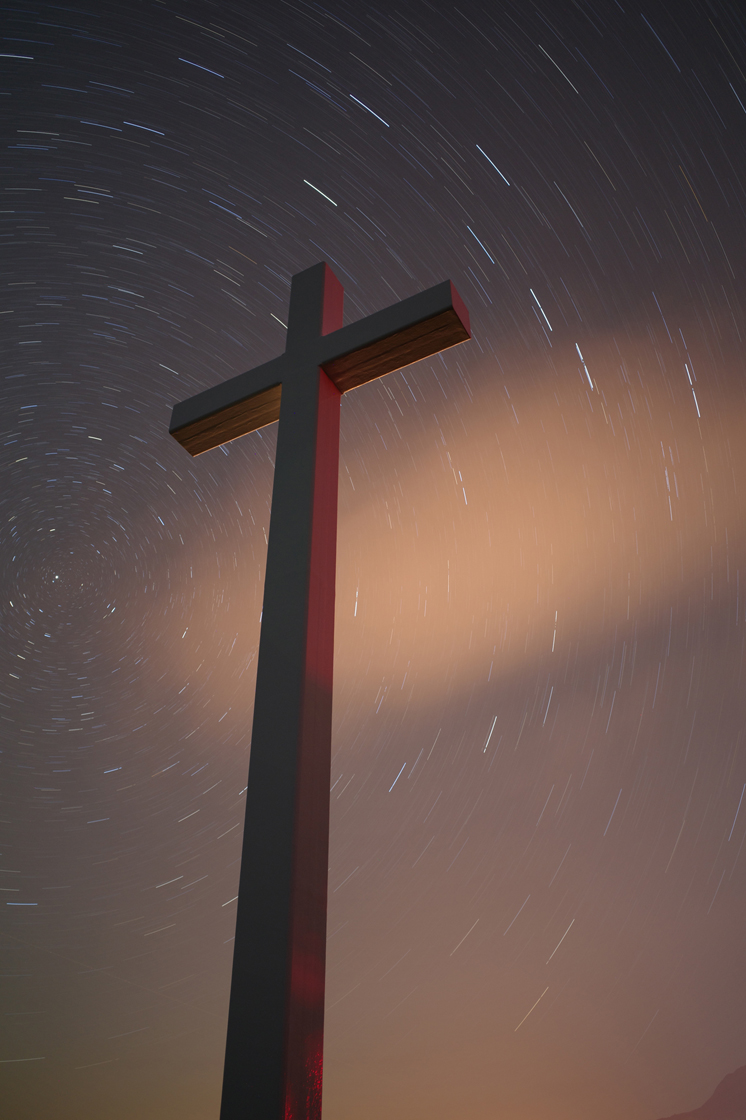
GRIII ISO 200, F 2.8 20min (=1200 sec) WB3700K M2B4
With the GRIII, the maximum exposure time has been extended to 20 minutes. You can now take star traces in one picture in such a dark environment.
The place was so dark that I set the ISO at as high as 200.
Set the camera to the manual mode and the shutter speed at “BT (Bulb Timer)” by ADJ/Control lever, then you can select the exposure time up to 20 minutes with Control dial.
Because the night sky was bluish and the cross and clouds reddish, I used the in-camera RAW development and created a "Hard Monotone" image with its Image Control.
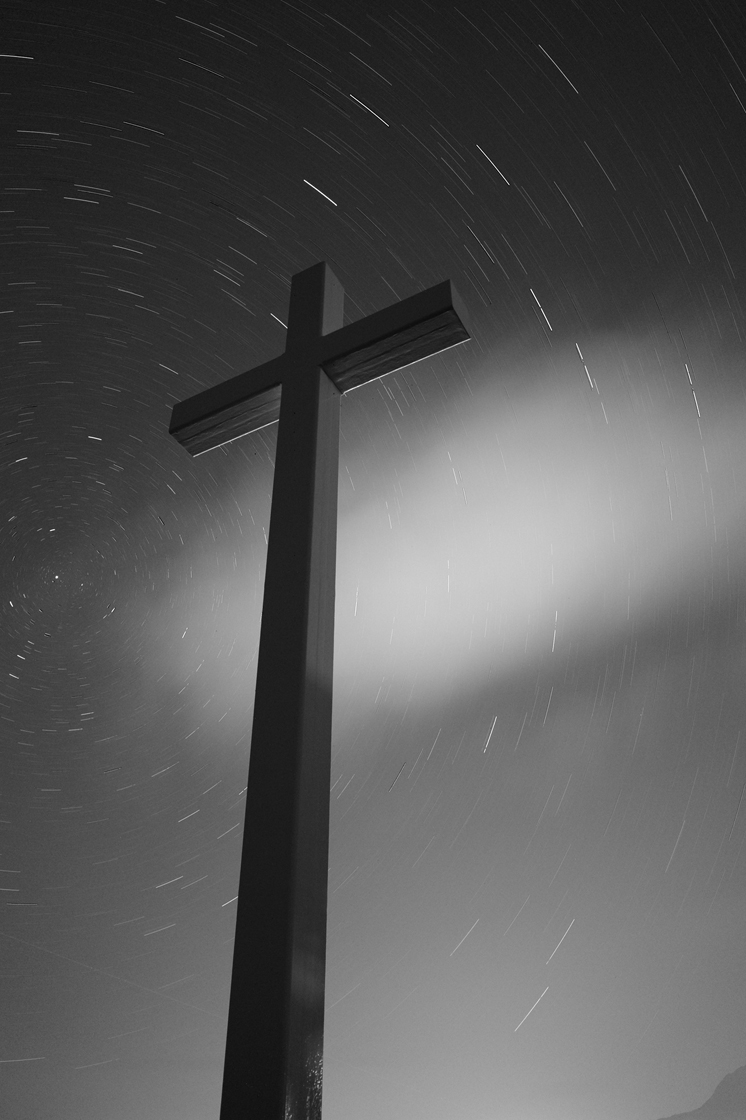
The result of the “Hard Monotone“ in-camera RAW development of the previous photo.
You can get a similar image to black and white film with red filter with it. It seems to be used mostly for daytime landscape photography but you can use it for starry pictures as well. The image has a different black and white tone than ordinary black and white image with high contrast.
How much high sensitivity noise is acceptable differs from person to person, but as for me, in the case of GR and GRII, the ISO 1600 was the limit. It was too noisy beyond that limit.
With the GRIII, I feel the ISO 3200 is acceptable. In the examples, it was so dark for the ISO 3200 that I set it one step higher. Even with that rate, it was not that noisy. It is more forgiving than the GR II.
All I can only show you in this introduction to the GR III starry sky photography were the examples in dark places. I hope you have understood that the high sensitivity noise performance has been improved in the GR III and how to use such new functions as the low-pass selector and bulb timer.
The condition was too severe for the camera this time. I will share with you more examples in different places later.
With the GR III, there have been some changes in the “Interval Composite”- a convenient function for urban starscapes. I will write about it in details too.
(KA-TSU)


